In this unit students explore tessellations using the context of bathroom tiles. Squares and dominoes are used in a variety of different colour combinations to help students develop design ideas and make a model of their own tile tessellation.
- Create simple tessellations involving squares and dominoes.
- Identify the repeating element(s) in simple tessellations involving squares and dominoes.
This unit is about tessellations, that is, patterns of identical shapes that cover a plane without gaps or overlaps. Students’ understanding of tessellations can tell teachers a lot about their knowledge of a range of geometric concepts, including angle and symmetry, and about their spatial awareness. These geometric concepts and understandings give students a means of interpreting and describing physical environments and can also be useful tools for problem solving.
Note that throughout this unit we have used the word ‘domino’ to denote a rectangle that is twice as long as it is wide.
For more detail on the progression of understanding of tessellations see the Geometry Exemplar.
You may also like to take some ideas from the level 4 unit Tessellating Art.
- Brochures from a tiling shop showing a range of tiling. Include a variety of tile shapes and colours in the examples
- Mosaic shapes
- Light-weight card in a variety of colours cut into squares and dominoes (a double square)
- Varnish
- Heavier-weight card or similar to use as a base for tile models
- Paint
- Glue
- Connected 1, 2001, Sandcasting with Plaster
Getting Started
In the first part of this unit we look at the idea of tessellations and use one design element to make a tessellation.
- Introduce the concept of tiling by explaining that you are renovating your bathroom and want to make one of the walls interesting by creating a tile pattern. Explain that you have been to a tiling shop and got some brochures for ideas and you would like the students to help you explore possible design ideas. Ensure that they know that a tiling/tessellation means that all of the wall area is to be covered.
- Place the brochures around the room and allow students time to browse. Discuss as a class:
What shapes are the tiles in the designs?
What shapes are used together to cover the space?
What colours are used in the designs? How are patterns created using colour?
What shape/shapes have been repeated to create the tessellations?
Why do you think the shapes tessellate? - Reinforce the ideas that all of the designs displayed cover all the space with no gaps remaining uncovered and each design consists of a regular repetition of one or more design elements.
- Give the students a range of mosaic shapes and allow them time to experiment with creating their own tessellating patterns using only one shape at a time. As they work, develop their ideas with questioning
Which shapes fit together to cover the surface?
Why do you think squares tessellate?
Will triangles tessellate? Why/why not? (Try it out.) - As they work reinforce the ideas that all of the space must be covered and that it is often easier to do this if there is a pattern to the tessellation. For instance, by alternating the same triangle shape up and down, you can tile a parallel strip. Clearly then you can put strips together to cover the whole of (plane) space.
Exploring
Over the next sessions lead your students through a variety of tiling explorations involving more than one shape and more than one colour.
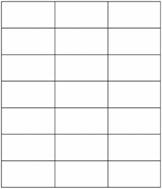
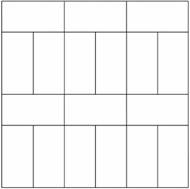
- Students can use squares and dominoes made from card to experiment with possible tessellations, comparing results and describing and discussing the different patterns produced. Increase the complexity of designs as you work.
What patterns can be made using dominoes and squares that all have same colour? - Now experiment with squares only but using more than one colour.
What patterns can you make? - Now go back to squares and dominoes and introduce different colours.
What patterns can you make using red squares and white squares along with blue dominoes?
What about green squares with yellow dominoes and orange dominoes? - Encourage students to create a variety of different coloured patterns that can then be repeated to produce a tessellation. There are many possibilities for designs so encourage exploration and allow time for discussion and experimentation.
- Create a chart as you work, recording the types of patterns possible when different types of tiles are used. This chart will be useful for students to refer back to later.
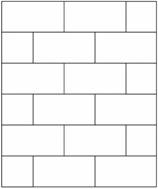
Domino tessellations
Reflecting
In the final session allow students the opportunity to construct tiling patterns by gluing shapes onto a ‘bathroom wall’ made up of a large sheet of paper.
- Have each student create their own design for the bathroom wall using ideas gained through their explorations. Encourage creativity and variety. Students can use card or paper tiles to develop their ideas but must present their designs in the form of a sketch to be approved before starting construction of their wall.
- Once their design has been approved students make their tiling using card, paint if desired, and a large sheet of paper to glue the ‘tiles’ onto. Once dry, the designs can be varnished to give a more realistic tile effect.
- Finished tessellations can be made into a classroom display with a final discussion of the tessellations displayed:
Which tessellation do you like? Why?
Look at Sarah’s. What are the shapes that have been repeated?
Which tessellation has made effective use of colour? Why?
Have two people used the same shape combinations with different colours? What is the effect of this?
Dear Family and Whānau,
We have been exploring tessellations (repeating patterns) in class this week. Take some time with your child to help them look for tessellations around their home. They could make a diagram of the tessellation to bring to class with them. Tessellations are particularly common in patterns of tiles and lino.